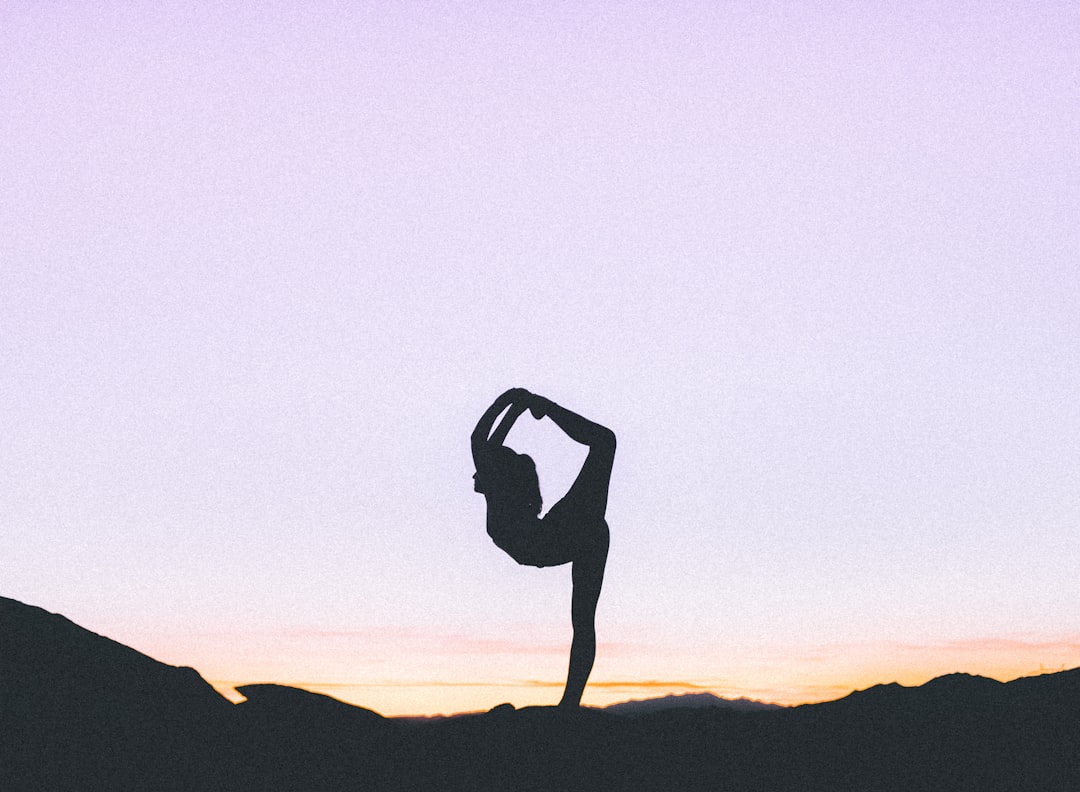
Designing a smart vinyasa flow sequence is a lot like coaching a great training session: you want intention, structure, enough challenge to create adaptation, and enough recovery to keep the body moving well. The best flows do not just string together pretty yoga poses; they create a rhythm that builds heat, opens joints, strengthens key patterns, and keeps the breath steady from start to finish. If you have ever wondered why some classes feel energizing while others feel chaotic, the answer is usually sequencing. This guide gives you a practical blueprint for building balanced vinyasa classes and home practices that work for beginner vinyasa students, athletic movers, and anyone who wants better flow for mobility or flow for strength.
We will break down sequencing principles, explain how yoga breathing exercises anchor movement, and map out sample sequences you can use and adapt. Along the way, I will reference useful guides like How to re-engage sidelined workers and why skilled workers are in demand everywhere right now because the same lesson applies here: people thrive when systems are clear, progressive, and matched to real-world capacity. In yoga, that means sequencing with purpose instead of improvising on the fly.
What Makes a Vinyasa Flow Effective
Vinyasa is movement with a logic, not random linking
At its best, vinyasa means placing movement in a deliberate order so the body and breath can stay connected. A strong class usually starts with simple shapes, gradually increases heat and complexity, peaks with a focused challenge, and then gradually comes down. That structure supports tissue preparation, nervous system regulation, and better movement quality. When teachers skip the preparation phase, students often compensate with poor alignment, excessive tension, or breath-holding. In other words, sequencing is not decorative; it is safety, accessibility, and performance all in one.
This is why every good flow needs a clear theme. Your theme may be hip mobility, shoulder strength, hamstring length, or a calming practice after sport. A theme helps you choose the right shapes, the right pacing, and the right transitions. If you want to see how data-driven structure can improve outcomes in another field, check out technical due-diligence checklists and ROI modeling and scenario analysis; yoga sequencing works similarly, by making sure each choice supports the whole system. Randomness wastes energy, while sequencing compounds benefits.
Heat, mobility, strength, and recovery should all appear in the arc
A balanced vinyasa flow should include at least four phases: preparation, build, peak, and integration. Preparation usually includes breath awareness, spine articulation, and joint circles. Build phase adds standing shapes, lunges, and repeated transitions to raise temperature. The peak is where the main goal of the class lives, such as standing balance, core work, backbending, or deeper hip opening. Integration includes slower floor work, downregulation, and a closing posture that leaves the nervous system calm rather than overstimulated.
Think of this like a training week. You would not jump straight into maximal lifting without warm-up sets, nor would you end a sprint session without cooldown. The same idea shows up in movement systems outside yoga too, such as bike fitting and riding position, where efficiency depends on progressive alignment rather than force. In a yoga flow, the right arc protects the joints while still building skill.
Breath is the metronome that makes vinyasa sustainable
Vinyasa should feel paced by the breath, not by ego. When students can keep breathing evenly, they are more likely to maintain good form, stay present, and avoid overgripping the neck, jaw, and shoulders. Common yoga breathing exercises for flow include full diaphragmatic breathing, ujjayi-style steady nasal breath, and counted inhale-exhale ratios to regulate pace. If breath becomes frantic, the sequence is usually too complex, too fast, or too intense for the current level.
For people who train hard in sports and fitness, this breath-led approach has a real performance payoff. It improves pacing, body awareness, and recovery between efforts. That is why many athletes like structured pre- and post-training routines, just as endurance nutrition matters before and after effort; see endurance fuel strategies before and after long workouts for a useful parallel. Breath is the bridge between intention and action, and without it, a flow becomes just exercise choreography.
Sequencing Principles You Can Use in Any Class
Start with what students need to feel safe
The first rule of sequencing is to choose movements that prepare the exact patterns you will ask for later. If the class will peak in lunges and twists, start by warming the ankles, hips, thoracic spine, and core. If backbends are coming, include gentle shoulder extension, glute activation, and upper-back extension work. If the theme is arm balance or plank strength, begin with wrist prep, serratus activation, and a manageable dose of core stability. This principle reduces surprise and increases success, which is especially important in beginner vinyasa classes.
Good warm-ups also reduce substitution patterns. For example, students with tight hips often steal motion from the low back if hip prep is skipped, while students with stiff shoulders may jam the neck during arm overhead sequences. A thoughtful build phase allows the body to distribute load more intelligently. If you want to think about adaptation in another context, consider how safety-first systems like injury management lessons from sports prioritize prevention and response rather than waiting for problems to appear.
Use “simple to complex” and “small to large” progression
One of the most reliable sequencing principles is simple to complex. Begin with smaller ranges of motion, fewer balance demands, and more familiar shapes before layering in deeper ranges or more demanding transitions. Another useful lens is small to large: start with joint isolations, then expand to whole-body patterns. For example, you may begin with cat-cow and low lunge pulses, then move into crescent lunge, revolved lunge, and crescent twist with a lift.
This also works within a single pose family. In standing work, you might move from mountain pose to chair pose, then to chair with twist, then to standing balance. In floor work, you may start with bridge, then add marching bridge, then single-leg bridge. The key is to respect adaptation time. This principle is similar to how teams standardize complex workflows in other fields, such as SDK design patterns that reduce friction by making the next step obvious.
Balance effort with recovery every few minutes
Students should never feel trapped in a long stretch of intensity without a release valve. Alternating effort and recovery keeps the breath steady and improves the quality of movement. After a few rounds of sun salutations, offer a down dog, child’s pose, or standing pause. After strong lunges, add a neutralizing shape like tabletop, kneeling, or a short forward fold. The best flows create waves, not walls.
This matters especially in athletic settings, where people may arrive already fatigued from running, lifting, or team practice. If you are programming for active bodies, remember that exertion without decompression often creates stiffness, not strength. A helpful analogy comes from tiny feedback loops in behavior change: small resets keep the whole system responsive. In yoga, those resets are breath pauses, neutral shapes, and mindful transitions.
Sun Salutation Steps: The Engine of Most Vinyasa Sequences
Classic Sun Salutation A as the baseline pattern
The classic sun salutation steps form the backbone of many vinyasa classes because they create heat while training coordination between breath and movement. A common Sun Salutation A looks like mountain pose, upward salute, forward fold, half lift, plank or step-back to chaturanga, upward-facing dog or cobra, and downward-facing dog. Each shape has a job: the fold lengthens the back line, the half lift re-establishes spinal length, the plank and lower-body transition build strength, and the backbend opens the front body. If you teach or practice vinyasa, this pattern is worth memorizing until it feels effortless.
What makes this sequence effective is not only the shapes but the timing. Inhale to lengthen, exhale to fold, inhale to find a half lift, exhale to step or float back, inhale to open the chest, exhale to return to down dog. When breath and movement sync, the practice becomes easier to follow and more meditative. For a broader perspective on how clarity improves trust and consistency, see A/B tests and structured hypotheses; sequence design benefits from the same intentional approach.
How to modify Sun Salutation for beginners
For beginners, the full vinyasa can be too fast or too strenuous at first, especially if the wrists, shoulders, or hamstrings are tight. Simplify by stepping back instead of jumping, lowering knees in plank, and replacing chaturanga with knees-chest-chin or cobra. You can also remove the upward-facing dog if lumbar compression is an issue and stay with a gentler cobra. The goal is not to “complete” the sequence; the goal is to practice clean mechanics and steady breathing.
Beginner-friendly modifications matter because they create confidence. When students can repeat a version that feels achievable, they learn the rhythm of the sequence without panic. That confidence later supports more advanced variations. For more context on adapting systems to different users, the logic mirrors clear security documentation for non-technical users: the structure should be understandable before it becomes advanced.
How to scale the same pattern for stronger athletes
For stronger practitioners, the same sun salutation can become a power sequence by adding controlled floats, longer holds, or extra strength demands. Examples include hovering in plank, slow-lowering chaturanga, knee-to-nose transitions, or step-back-to-lunge-to-chair combinations. Advanced students may also benefit from tempo work: slower descents and pauses at the bottom of the movement. This creates meaningful strength gains without abandoning breath awareness.
Still, the best advanced flow is not the fastest one. It is the one that preserves shape quality under fatigue. Overly aggressive tempo often leads to shoulder dumping, rib flare, and rushed transitions. For a sports-performance parallel, brands that study sport closely often succeed by matching demand to context rather than forcing volume for its own sake. Vinyasa sequencing works the same way.
How to Link Breath to Movement Without Losing Control
Match inhale with expansion and exhale with grounding
The simplest rule for breath-led movement is to pair inhalation with expansion and exhalation with grounding or contraction. Inhale as you lengthen the spine, sweep the arms overhead, open the chest, or lift the heart. Exhale as you fold, twist, stabilize, or lower with control. This pattern gives students an intuitive roadmap, and it helps prevent breath-holding during effort.
However, breath pairing should never become rigid. Some shapes need exceptions, especially when joint comfort or balance comes first. For example, in a twist, you may inhale to lengthen before exhaling into rotation. In a standing balance, the breath may need to stay even rather than perfectly matched to every micro-movement. The best teachers treat breath as guidance, not a straitjacket.
Use counted breathing to slow pace and reduce anxiety
Counted breath is one of the most effective yoga breathing exercises for class pacing. You might cue four-count inhales and four-count exhales in warm-up, then shift to a natural breath in more intense work. For relaxation, a longer exhale can help downshift the nervous system. For example, a 4-in/6-out pattern often feels calming without being overly technical.
This can be especially useful for athletes who are wired to perform and may rush through recovery. Breath counting gives structure, which helps students stay present under stress. It also gives teachers a way to regulate group tempo without constantly saying “slow down.” The same principle shows up in systems thinking and quality control: a good process uses a simple framework that can be repeated under pressure. That is one reason frameworks like ready-to-use transparency templates are so effective—they make complex work legible.
Use breath to signal transitions, not just poses
Many students think breath only matters inside poses, but transitions are where breath often breaks down. A smart teacher cues the breath before the movement begins, giving the body a split second to organize. For example: inhale to prepare, exhale to step through, inhale to rise, exhale to fold. These micro-cues keep the sequence smooth and reduce chaos in crowded classes.
When in doubt, slow the transition rather than the pose itself. Students usually struggle less with holding a shape than with entering or exiting it. By controlling transitions, you lower risk and improve learning. This approach resembles how strong project teams work with checkpoints and handoffs, much like beta reporting or campaign analytics dashboards, where the details of the handoff determine the outcome.
Sample Vinyasa Flow Sequences for Different Goals
Flow for mobility: hips, spine, and shoulders
A mobility-focused sequence should emphasize joint range, controlled rotation, and slow exploration of end ranges. Start with cat-cow, thread-the-needle, and low lunge with a gentle twist. Progress to crescent lunge, lizard variation, half split, and standing hip circles before returning to a floor-based hamstring release. This kind of flow should feel like a conversation with the body, not a forced stretch. Keep transitions smooth and avoid long, aggressive holds early on.
For many fitness enthusiasts, mobility work is the missing link between training days and recovery. It helps maintain mechanics in running, lifting, and sport-specific movement. A good mobility flow does not just “open” tight areas; it teaches control in those ranges. If you want to compare it with another field’s precision-and-fit approach, consider how modular wall storage blueprints organize tools for easy access: the goal is better function, not just more space.
Flow for strength: plank patterns, lunges, and balance
A strength-driven sequence should repeat key loading patterns enough to create fatigue without collapsing form. Start with plank variations, side plank, low lunge, high lunge, chair pose, and warrior III. Add controlled chaturanga repetitions if the student has sufficient shoulder and core control. Use short holds, slow lowers, and repeated side-to-side work to challenge stability. For a clean strength sequence, quality matters far more than quantity.
One effective formula is to pair a standing load with a floor load. For instance, flow from chair to high lunge to warrior II, then to side plank, then back to the standing side. This keeps the body from over-focusing on just one joint angle. It is similar to how resilient systems distribute load across multiple parts, like secure pipeline workflows, where redundancy and sequencing reduce failure points.
Flow for recovery: nervous system downshift and reset
When your goal is recovery, the vinyasa should become softer, longer, and less demanding. Start with constructive rest, then add cat-cow, supported child’s pose, gentle sphinx, low lunge with minimal depth, and supine twist. The emphasis is on smooth breathing, longer exhales, and low-threat shapes that let the parasympathetic system emerge. You can still include a few fluid transitions, but the pace should feel almost restorative.
This type of practice is useful after hard training, travel, or stressful workdays. It helps the body transition from high alert to better baseline function. Think of it like recovery protocols used in other industries, where systems need downtime to stay reliable. The same philosophy appears in business continuity planning: the smartest systems are the ones that can pause, restore, and continue.
| Goal | Main Pose Families | Best Breath Cue | Intensity | Best For |
|---|---|---|---|---|
| Mobility | Low lunge, twists, half split, shoulders | Long inhale, soft exhale | Low to moderate | Tight hips, desk stiffness, post-training recovery |
| Strength | Plank, chair, warrior, side plank | Steady nasal breathing | Moderate to high | Athletes, core development, upper-body load |
| Beginner vinyasa | Mountain, fold, cobra, down dog | Simple inhale/exhale pairing | Low to moderate | New students, nervous beginners, return-to-yoga |
| Calm and recovery | Child’s pose, sphinx, twist, forward fold | Longer exhale than inhale | Low | Stress management, cooldown, sleep support |
| Mixed athletic flow | Lunge, balance, plank, hinge, twist | Breath-led transitions | Moderate | Cross-training, conditioning, movement quality |
Modifications in Vinyasa for Different Bodies and Goals
Give every shape a clear “base version” and “upgrade version”
One of the most useful ways to teach modifications in vinyasa is to provide a base version and an upgrade version for each key shape. For example, in chaturanga the base may be knees down or lowering halfway with a block under the chest, while the upgrade might be a hover or slow eccentric lower. In warrior II, the base might be a shorter stance with fewer demands on the hip flexors, while the upgrade could be a deeper bend or a breath hold. This gives students autonomy without making the class feel fragmented.
Good modifications should never feel like punishment. They should feel like intelligent scaling. This mindset is important for people with limited wrist extension, knee sensitivity, or low-back sensitivity, because the right variation keeps the pattern while reducing strain. The same logic appears in consumer guidance like reading reviews before ordering: the right decision depends on fit, not hype.
Common modifications for wrists, shoulders, knees, and lower back
For wrist discomfort, reduce time in full plank and use fists, wedges, forearms, or elevated hands on blocks. For shoulder issues, minimize repeated chaturanga and emphasize scapular control in tabletop and wall work. For knee sensitivity, shorten stances, avoid aggressive deep flexion, and use support under the back knee in lunges. For lower-back sensitivity, keep core engagement moderate, avoid overextension in cobra or upward-facing dog, and shorten backbend depth. These adjustments allow students to continue practicing while protecting irritated tissues.
It helps to remember that pain is not a character flaw and modification is not defeat. In fact, intelligent scaling often accelerates progress because it keeps the student consistent. This is exactly how high-performing systems in other domains stay resilient, much like practical rehabilitation strategies that protect function while supporting gradual recovery. In yoga, consistency beats intensity when the goal is long-term practice.
How to adapt for beginners, intermediates, and advanced students in one class
The easiest way to manage mixed-level classes is to keep the outer shape the same while varying the demands inside it. Everyone may come to crescent lunge, but beginners keep hands on hips or blocks, intermediates add overhead reach, and advanced students include a twist or balance challenge. In this way, the class stays unified while each person works at an appropriate level. That is far better than assigning totally separate sequences that make the room feel disconnected.
A second strategy is to vary tempo. Beginners often benefit from fewer transitions and more time to orient themselves. Advanced students may enjoy longer sequences, stronger holds, or more complex linking patterns. The teacher’s job is to make every option legible. If you want a systems-based example of choosing the right level of complexity, look at deep laptop reviews that interpret lab metrics; the best reviews help different readers make the right choice for their use case.
How to Build Your Own Vinyasa Flow Step by Step
Step 1: Decide the goal and time available
Start by asking a simple question: what should this practice do? The answer could be “wake up the body,” “open hips after a run,” “build upper-body strength,” or “wind down before bed.” Then determine your time window. A 20-minute practice needs far fewer transitions and far less complexity than a 60-minute class. Clarity here prevents overstuffing the sequence with too many themes.
Once you know the goal, choose one primary movement family and one secondary family. For example, a mobility class might center on lunges and twists, while a strength class might center on planks and balances. This keeps the practice coherent. You can think of it as a design brief, similar to how creative teams work from a focused outline in a creative brief for a group collaboration.
Step 2: Map the arc from warm-up to peak
After the goal is set, build the class in layers. Begin with centering and mobility prep, move into a gradual warm-up, add standing or floor strength work, and then introduce the peak pose or peak pattern. After the peak, provide balancing shapes and slower recovery movements. This arc helps students feel the journey instead of a jump cut between unrelated poses.
A useful planning trick is to write the sequence in five columns: breath, prep, build, peak, and cooldown. Put each pose into one column and ask if it logically leads to the next. If not, simplify the transition or replace the pose. Sequencing becomes much easier when you can visually spot what is missing. This process is very similar to iterative workflow planning in beta reports or structured testing.
Step 3: Test the flow with real bodies and honest feedback
One of the most overlooked parts of yoga sequencing is testing. A sequence that looks excellent on paper may feel rushed, repetitive, or confusing once real people move through it. Practice it yourself at full speed, then at half speed, and finally with different variations. Notice where your breath gets strained, where transitions feel awkward, and where the class loses energy. Good teachers revise constantly rather than defending a sequence that does not land.
Feedback matters because yoga is embodied learning, not a spreadsheet. Still, there is a strategic side to testing: the more you repeat, refine, and observe, the more consistent the result becomes. If you want an analogy from another field, consider how link analytics dashboards help teams see what is actually working. Your yoga sequence deserves the same level of attention.
Common Sequencing Mistakes and How to Fix Them
Too many peak poses, not enough preparation
One common mistake is trying to fit three or four “cool” peak poses into a single class. That usually creates cognitive overload and physical sloppiness. Instead, choose one main objective and let everything else support it. If your flow is supposed to prepare for a twist, do not also chase a deep backbend and a balance inversion unless the class is long enough to truly support that work. Less can absolutely be more.
Another related issue is skipping warm-up because the first few vinyasas feel active enough. That is risky, especially for shoulders, hips, and hamstrings. Students may feel “warm” but not actually prepared for the next demand. The correct fix is not adding more intensity, but adding more specificity. Good sequencing is like good infrastructure: it supports what comes next instead of hoping it will work. That is the logic behind resilient frameworks such as security pipelines that catch problems before they spread.
Rushing transitions and abandoning breath
If students cannot maintain breath, the class is probably moving too fast. Rushing through transitions often hides imbalance in the sequence, because the teacher is filling time with motion rather than with intention. Slowing transitions can actually make a class feel more advanced, not less. It gives students a chance to own the movement instead of just surviving it.
Another fix is to repeat fewer shapes more intelligently. Repetition is not boring when it allows skill to deepen. In fact, athletic and skill-based practices rely on repetition all the time, from running drills to weight training sets. The same principle helps in vinyasa. When you repeat a shape with slightly different entry points, the body learns more efficiently.
Ignoring the downshift at the end
Many flows end abruptly, as if the class is a workout with no aftercare. That leaves students feeling wired, not integrated. Always include a cooldown that lowers heart rate, reduces muscular tone, and encourages parasympathetic recovery. Floor-based shapes, longer holds, and a final resting posture help seal the practice. Without this phase, even a well-designed flow can feel incomplete.
Think of the cooldown as the sentence that makes the paragraph make sense. It is not an optional afterthought. A practice that ends well is remembered as coherent and satisfying, just as systems with strong closure are easier to trust. For a final conceptual parallel, consider how thoughtful product unpacking, like luxury fragrance unboxing, shapes the whole experience after the main reveal.
Putting It All Together: A 30-Minute Blueprint
Example class arc
Here is a simple 30-minute structure you can use as a template. Begin with 3 minutes of breath and spinal mobility. Spend 6 minutes on cat-cow, thread-the-needle, and low lunges. Use 8 minutes for a standing warm-up with sun salutations and repeated lunges. Reserve 8 minutes for your peak strength or mobility pattern, such as warrior III, side plank, or revolved crescent. Finish with 5 minutes of floor recovery and breathing.
This structure works because it gives each phase enough time to matter without dragging. It also scales nicely for different levels. Beginners can use more resting shapes and shorter holds, while advanced students can extend the peak and reduce the number of pauses. If you want to deepen the planning mindset, the same disciplined approach appears in rehabilitation planning and other structured recovery models.
How to know the sequence worked
You will know a sequence worked if students leave feeling clear, not confused; energized, not depleted; and challenged, not scattered. Breath should be steady for most of the class, and the peak should feel earned by the warm-up rather than forced by the teacher’s ambition. Students should also be able to name the goal of the practice afterward, whether that goal was mobility, strength, or calm. That kind of clarity is the hallmark of a well-built flow.
When that happens, sequencing stops being an abstract skill and becomes a service to the practitioner. That is the real goal of vinyasa design: creating a practice that supports the body, educates the nervous system, and respects individual capacity. For further reading on performance-minded movement and recovery, explore more of our library and keep refining your own sequencing language.
Pro Tip: If you remember only one rule, remember this: every strong vinyasa flow should answer three questions in order — What is the body preparing for? How does breath support that work? And how does the class come back to center?
Frequently Asked Questions
What is the best way to create a beginner vinyasa sequence?
Start with breath awareness, gentle spinal movement, and a few simple standing shapes before introducing any full sun salutations. Keep transitions slow, use clear breath cues, and offer knee-down or block-supported options. The goal is consistency and confidence, not complexity.
How many sun salutations should a vinyasa class include?
That depends on the goal and the level of the class. Beginners may only need 2 to 4 rounds, while stronger classes may use more as a warm-up or conditioning block. The number matters less than whether the repetitions are helping students prepare without losing form.
What are the most important sequencing principles in vinyasa?
The most important principles are progression, specificity, and balance. Sequence from simple to complex, warm the tissues you plan to challenge, and always include a recovery phase. Breath-led pacing should support every choice.
How can I modify vinyasa for tight shoulders or wrists?
Use elevated hands, shorter holds, forearm variations, and fewer chaturangas. You can also replace some plank work with tabletop or wall-based options. Modifications should reduce strain while keeping the movement pattern recognizable.
Can vinyasa help with mobility and strength at the same time?
Yes. Vinyasa is especially effective when the flow combines active range of motion with stable loading. For example, low lunges build hip mobility while planks and balances build control. The key is to sequence both qualities intentionally instead of trying to do everything at once.
Related Reading
- Endurance Fuel with Asian Foods - Learn what to eat before and after demanding workouts.
- A Simple Guide to Fitting Your Bike - A useful analogy for alignment, setup, and efficiency.
- Injury Management Lessons from Sports - Practical ideas for prevention, response, and recovery.
- Neuroprotection in Everyday Life - Recovery strategies that support long-term resilience.
- How to Read Deep Laptop Reviews - A lesson in reading data with precision and context.